Subtitle a video
Contents
Create a project
Start by launching Subs Factory. The window below should appear.
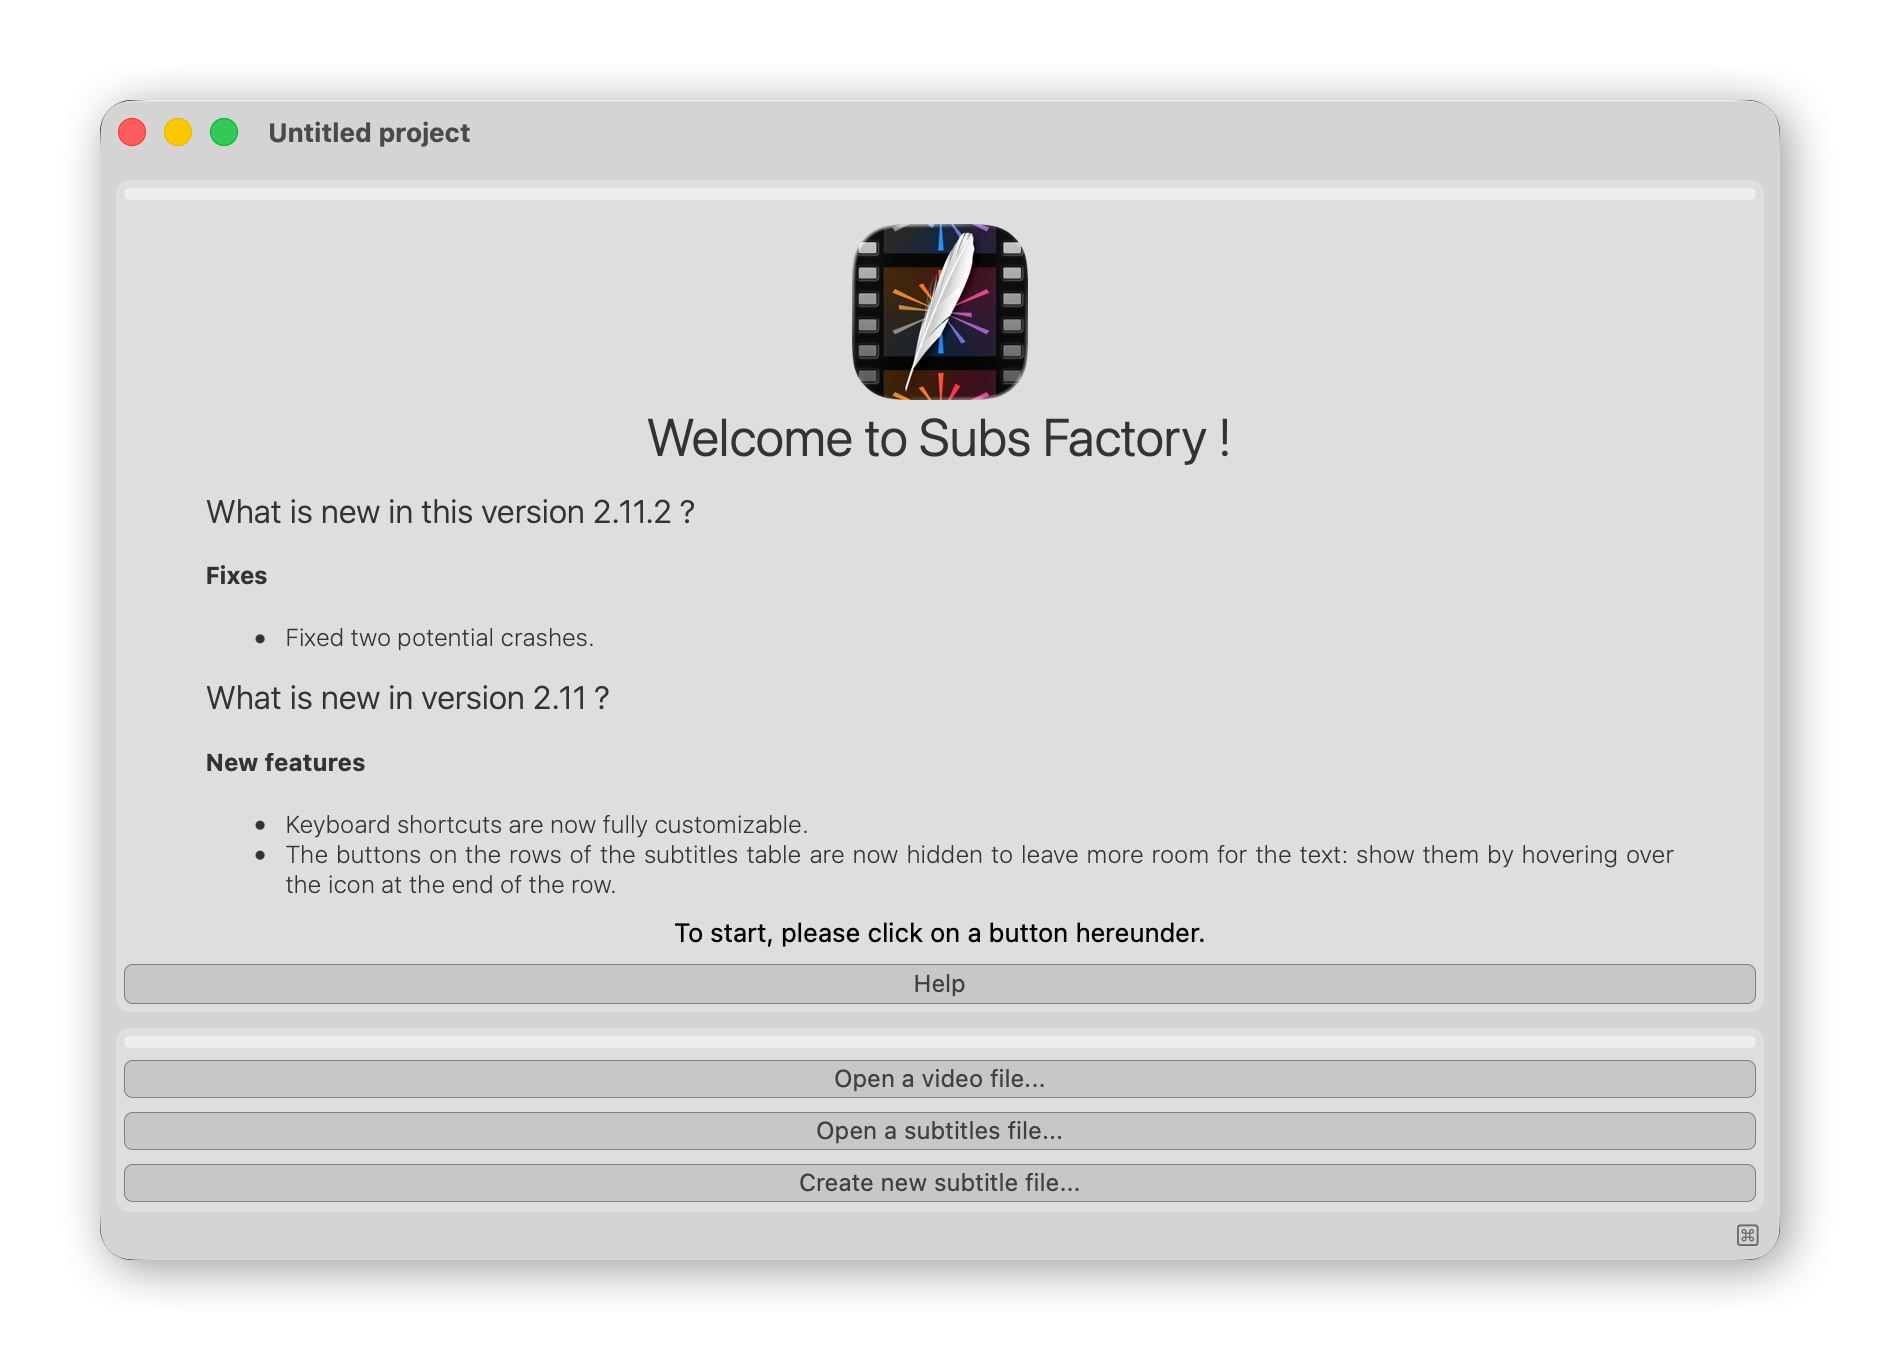
Click the "Open a video file" button. Then, in the window that appears, select the video file you want to subtitle.
Finally, you can save the created project. In the "Project" menu, choose "Save", then select the saving location.
Please note that the project file, which has a .sfp extension (for Subs Factory Project) will contain your subtitles, markers and settings, but not the video: the file would be much too heavy. Only the video file location is stored; if the file is moved, Subs Factory will ask for its location again.
Create subtitles automatically
Automatic subtitle creation, also known as transcription, is a paid feature (Why?), and requires purchasing transcription time via an in-app purchase. However, free transcription time is offered when you enable the feature for the first time.
If your video or audio file has multiple audio tracks, select the one you want to base your subtitles on using the menu located below the video (or below the "Audio only." label if applicable), on the left.
The automatic transcription feature requires an internet connection. The selected audio track is compressed and sent to the transcription server, but will in no case be used for anything other than its transcription, and is not retained once the transcription is complete.
Then, click the "Transcribe audio" button located above the video. The first time, a window lets you enable the feature for free. The following window then appears.
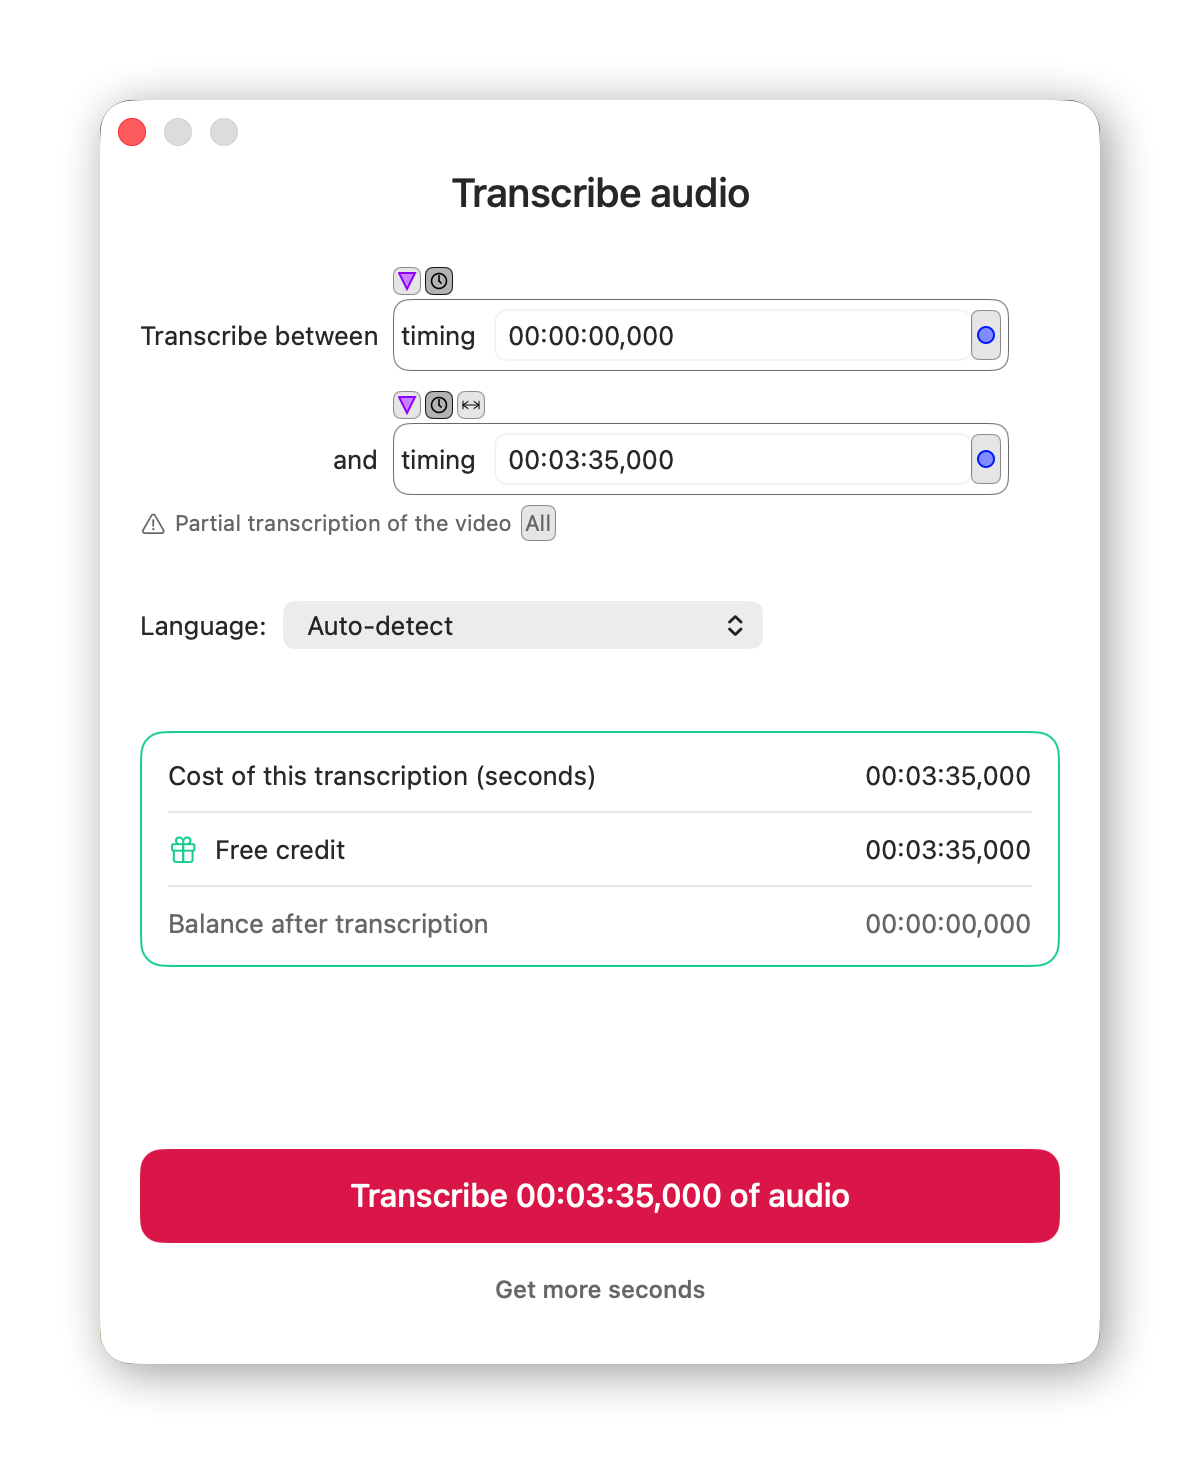
First, choose which part of the file you want to transcribe. To save your credits, it is advisable to do it in ranges, avoiding long stretches of silence or music.
By default, the fields for entering the start and end of the transcription range are set to the beginning and end of the file. If you use markers, the easiest way to define the range to transcribe is to place markers at the beginning and end of the chosen range, then use the small arrow to the right of the input fields to select those markers as the start and end of the range. If you have reduced the range, the "All" button lets you select the whole file again.
The "Language" menu allows you to choose the language of the audio to transcribe. It can be left at
"Auto-detect", however specifying it manually can help avoid detection errors, for example
when dealing with variants of the same language.
On the other hand, if your audio track contains several different languages, to transcribe them all,
you must choose "Auto-detect", as detection is performed separately for each sentence. If you specify
a language, sentences in another language will be poorly transcribed or not transcribed at all.
A summary then shows the duration of the transcription you are about to perform, as well as your remaining balance. If it is not sufficient to complete the transcription, the missing time is shown: you can then get more seconds with the main button, or reduce the range. Otherwise, the "Get more seconds" link, at the bottom of the window, lets you top up your balance.
Finally, click the "Transcribe … of audio" button. A new subtitle file is created in the project, containing the transcription. Don't forget to save the project or export the newly created file, to avoid losing it.
You can also start a transcription with the "Create new subtitle file..." button, by choosing "Transcribe audio track".
Create subtitles manually
Click the "Create new subtitle file..." button, located at the bottom right of the window. An empty subtitle file is created in the workspace.
The main window should now look like this:
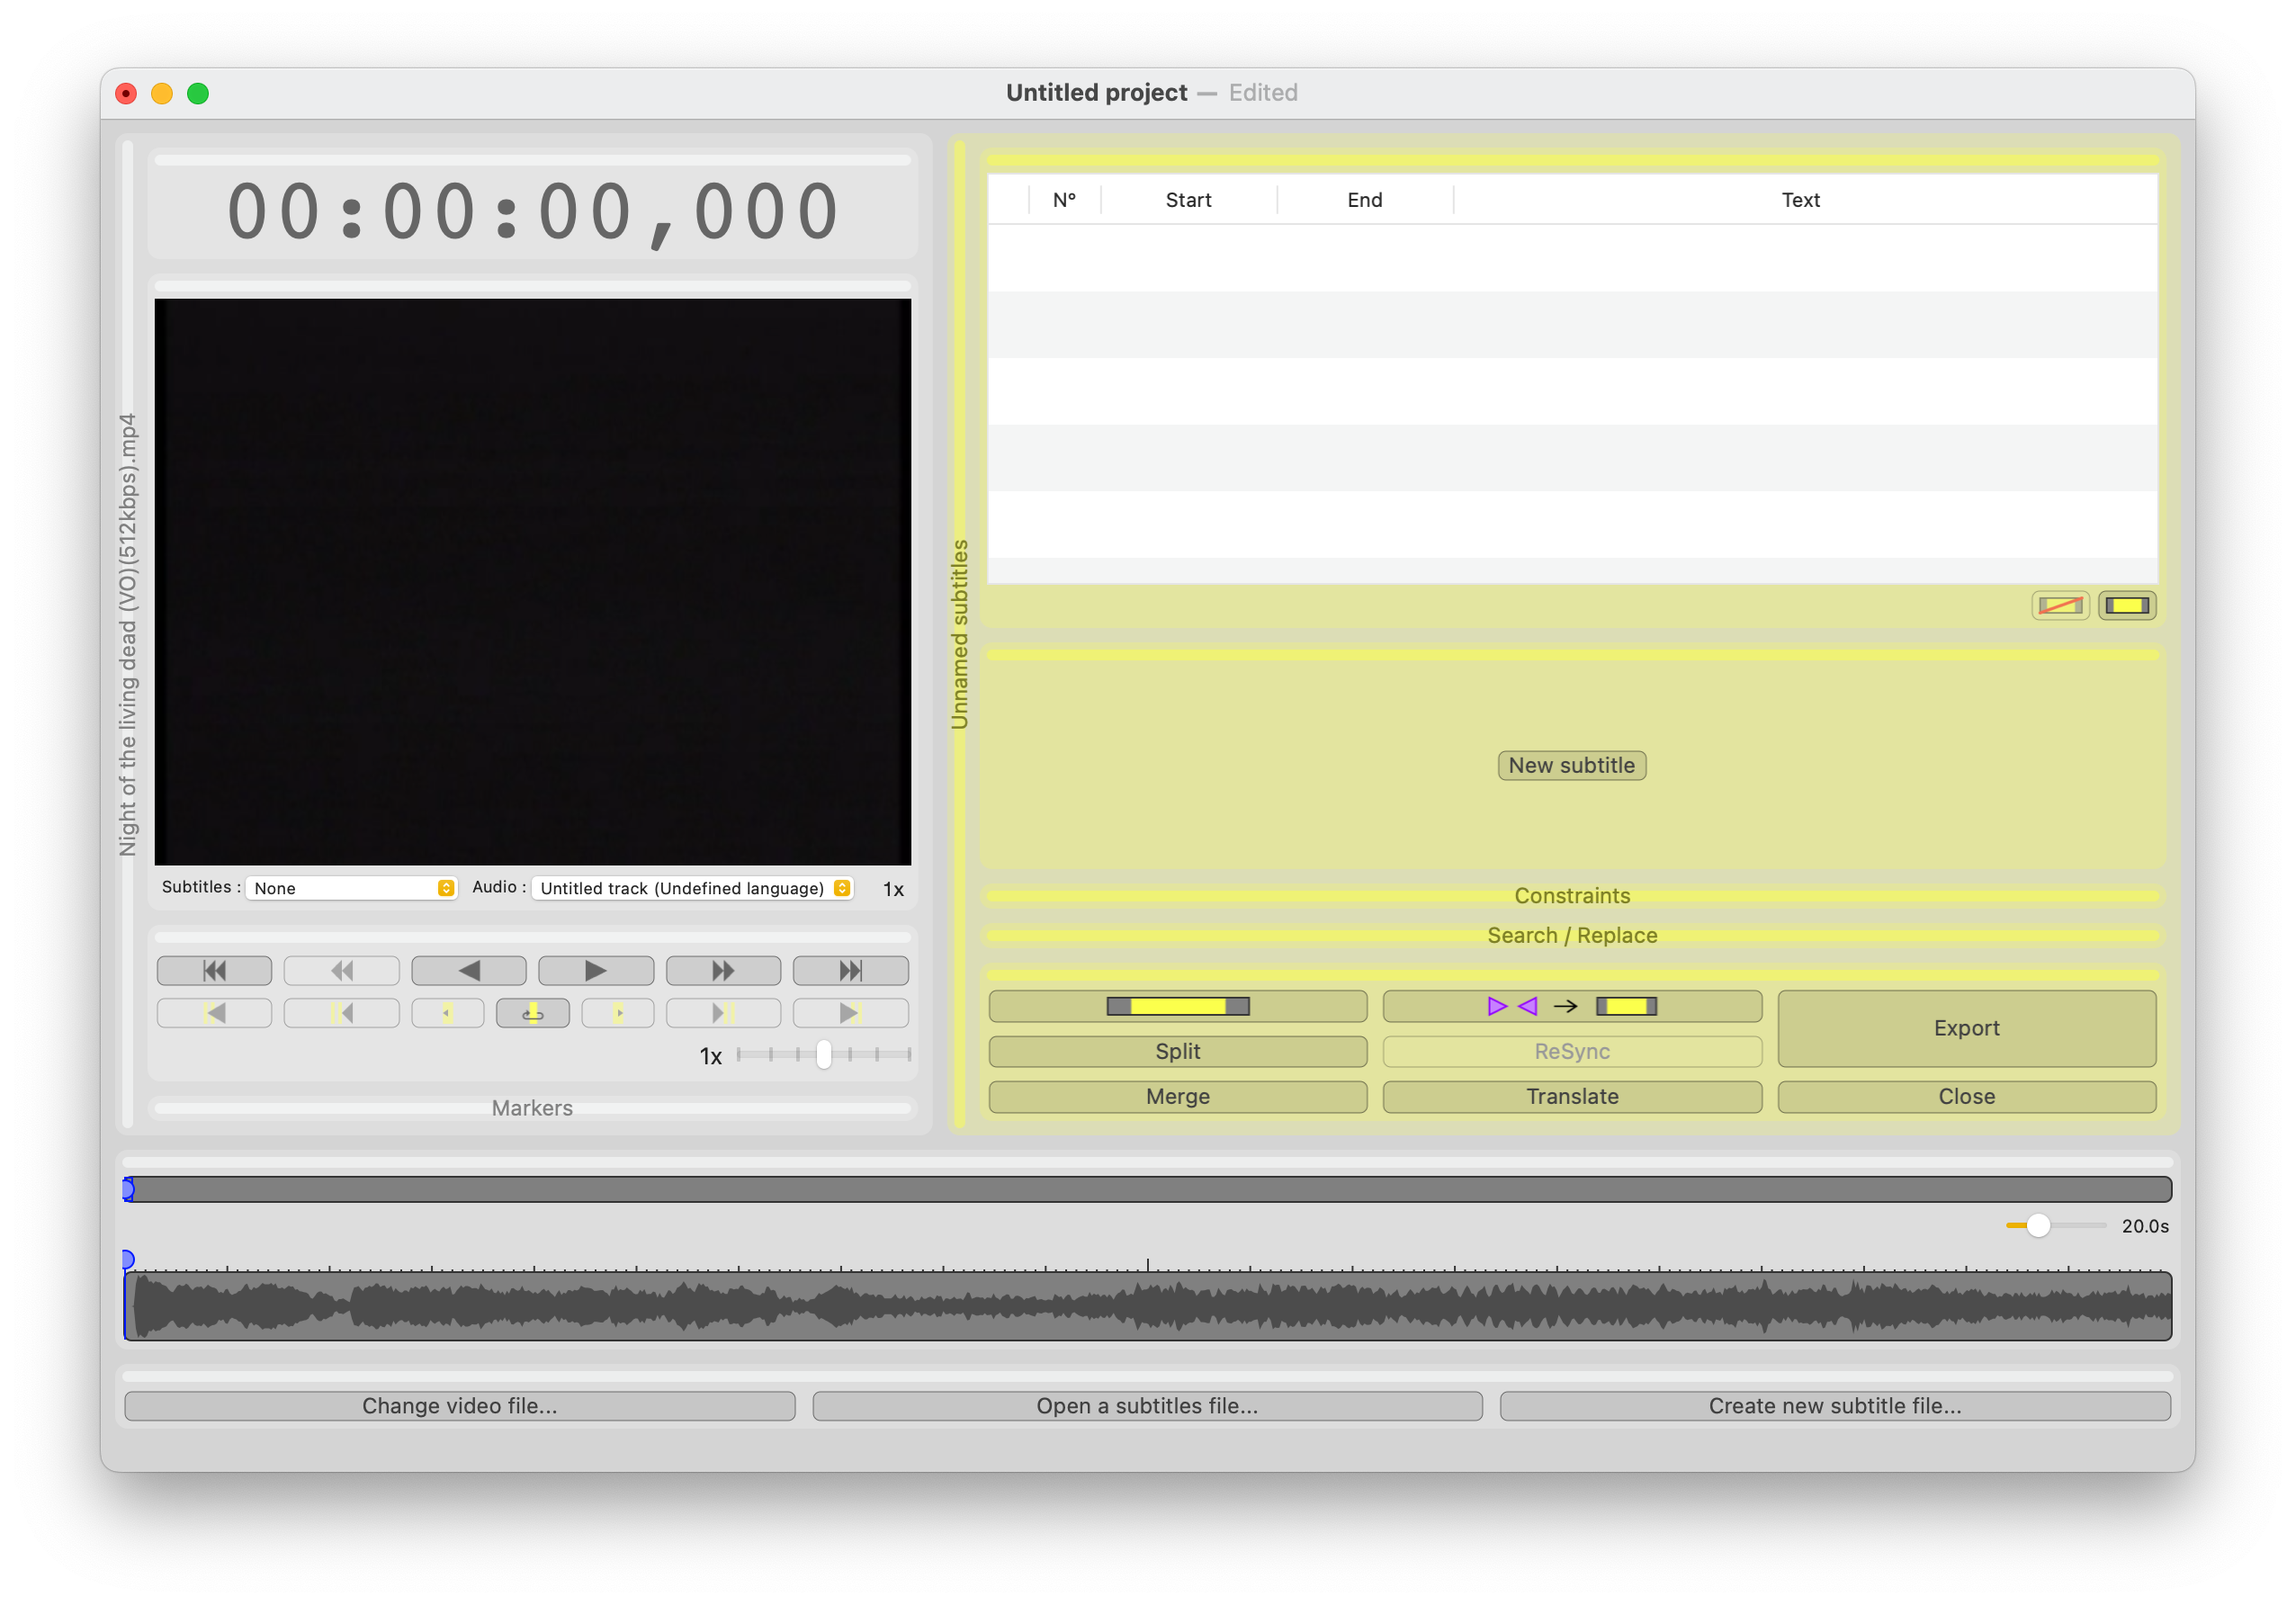
To simply create an empty subtitle, there are two solutions:
Play the video (at slower speed for more precision, thanks to the speed slider in the controls palette).
Type I (for in) on your keyboard when the subtitle should begin - for example when someone starts to speak. Then type O (for out) at the end of the subtitle. You have just created a beginning marker
 and an end marker
 .
. Markers can be seen in the detailed timeline (the bottom one):
In this picture, they mark two subtitles.
If needed, you can adjust their precise location by dragging them in the timeline with your mouse.
Then, use the
 button (or the
⌘K keyboard shortcut)
to transform those two markers into one subtitle.
button (or the
⌘K keyboard shortcut)
to transform those two markers into one subtitle.You can also use this button only once, after creating markers for several subtitles.
Locate the beginning and end of the subtitle, for example by looking at the timeline waveforms, at the bottom of the window. While holding down the option (⌥) key, click in the detailed timeline (the bottom one) on the location for the subtitle beginning. Keep the mouse button pressed, and drag to the end location. Once there, release the button. The subtitle is immediately created.
If you click without dragging the mouse, a subtitle with default length is created, starting where you clicked. You can then adjust its end by dragging it.
You can then either create all the empty subtitles first, by repeating the steps described previously, or enter the text for the created subtitle right away, by following the steps hereafter :
- Activate looping on current subtitle, thanks to the
 button from
the controls palette (or by typing C), then play the video (e.g. by pressing the space bar).
button from
the controls palette (or by typing C), then play the video (e.g. by pressing the space bar).
- If the subtitle to edit is not already selected, then select it in the subtitles table, or by clicking on it in the timeline.
- Type E. This activates the subtitle editing field (you can also activate it by clicking in it, or by double-clicking on the subtitle in the detailed timeline).
- Type the subtitle text while listening to its audio (which is playing in a loop).
- Type ⌘E to finish editing the subtitle, then V (or
 button from the controls palette) to exit the loop.
Playback will continue until the next subtitle, which you can edit in the same way by typing E, etc.
The field used for quick subtitle editing can be defined in the ergonomy preferences.
Adjust
Should you be dissatisfied with a subtitle timing, you can adjust it: see the "Resynchronize a single subtitle" section of the "Resynchronize subtitles" page.
Delete a subtitle
To delete a subtitle, you can use the  button, which exists in
both "Subtitles table" and "Subtitle edition" palettes. It deletes the selected subtitles.
button, which exists in
both "Subtitles table" and "Subtitle edition" palettes. It deletes the selected subtitles.
You can also click on the subtitle in the detailed timeline while holding the option (⌥) key. It is immediately deleted.
It is possible to undo a subtitle deletion via the "Edit" menu, or with the ⌘Z keyboard shortcut.
Export subtitles
To get back a .srt file from a Subs Factory project, use the "Export" button of the "Actions" palette. You will then be asked for the file format (the most common being "SubRip (.srt)"), as well as the text encoding ("Unicode UTF-8" is recommended) you want to use, and finally for the location where you want to save the file.
It is possible to export subtitles in a custom format.